Bitrise is a Mobile Continuous Integration and Delivery service. It has a lot of integrations and the number of integrations increases very fast. The best thing about integrations is that they are completely open source.
Prehistory
Bitrise provides range of stacks, and you can decide which one to choose for your project. I’m doing Android development and everything related to Android is automatically interesting to me.
I wanted to contribute to bitrise-steps something related to Android. Inspiration came from bitrise-discuss and I’ve chosen “Install Cordova and Ionic”. Both Cordova and Ionic platforms were new to me, which even more increased my interest.
As all Android jobs on bitrise.io are running in isolated docker containers, all what I needed to do is to extend existing bitrise docker images and add Cordova support.
It took me 2-3 weeks to prepare docker image for bitrise.io with Cordova related dependencies installed. It’s a bit long period of time, as I had problems with freezing docker containers on my local PC (every time when cordova build command was executed, I’ve got frozen docker container). I’ve tested my docker image on Mac OS a lot - and got frozen container on cordova build. Than I’ve configured ubuntu-14.04 using Vagrant, installed docker in ubuntu-14.04 VM - same effect. But I knew that configuration is ok, as I read tons of articles about docker images already, checked some other docker images which have Cordova related dependencies.
Finally, I’ve published docker-android-cordova image to Docker Hub and decided to give a last try to my docker image at bitrise.io. And it worked! ![]()

How to build Cordova-based Android project on bitrise.io using dedicated docker image
-
Add your Cordova Android project to bitrise.io (”+ Add new app” button).

-
Follow the steps and add your application. In this case I’m using Cordova Android Sample application. It’s a default Android application generated with
cordova createcommand + some cordova android plugins.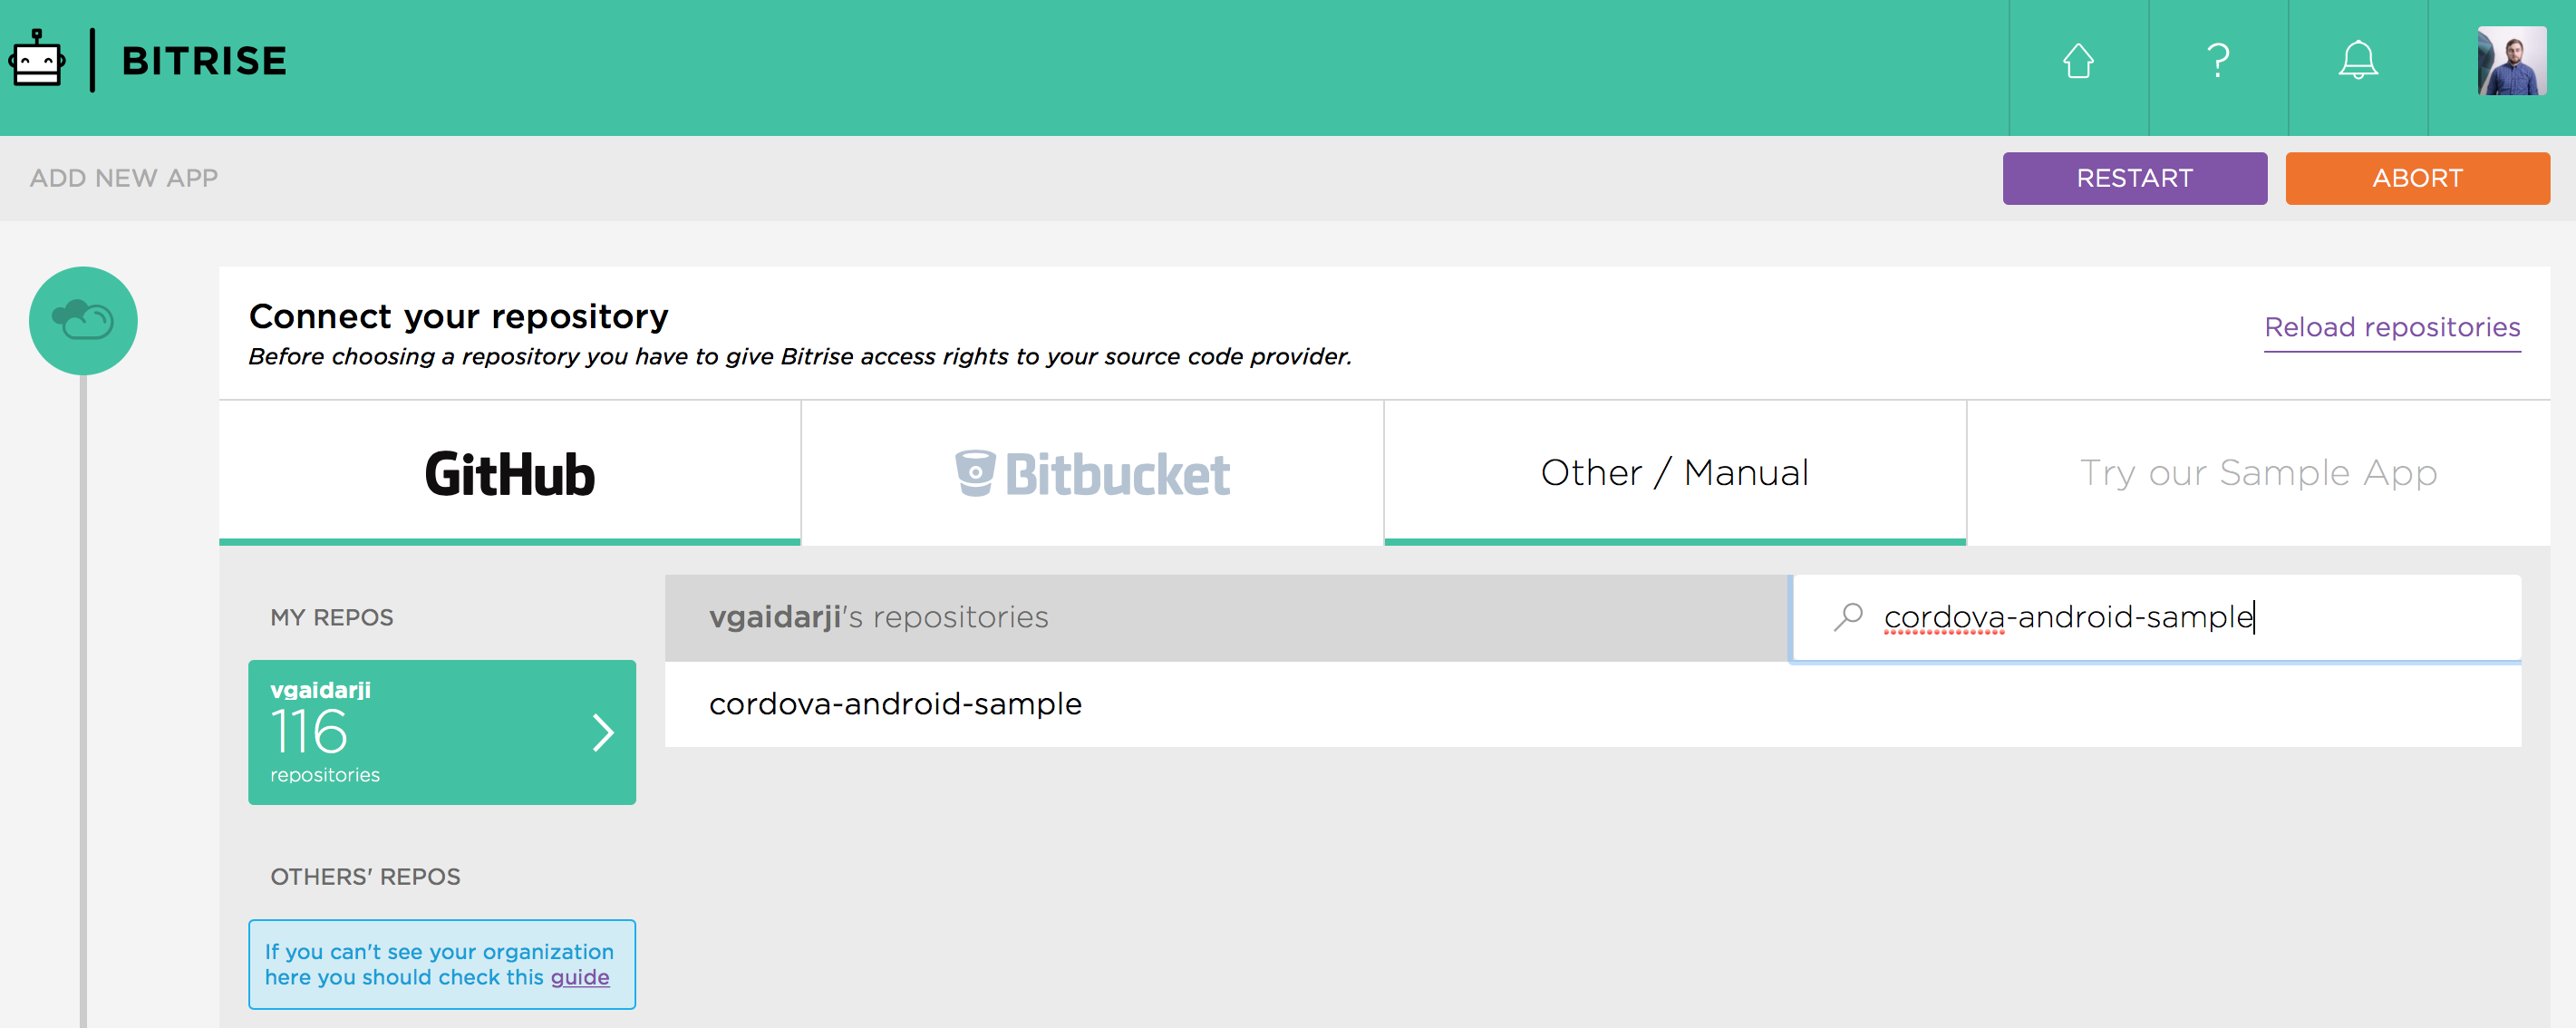
-
At
"Project build configuration"step choose"Configure it manually"and select Android platform.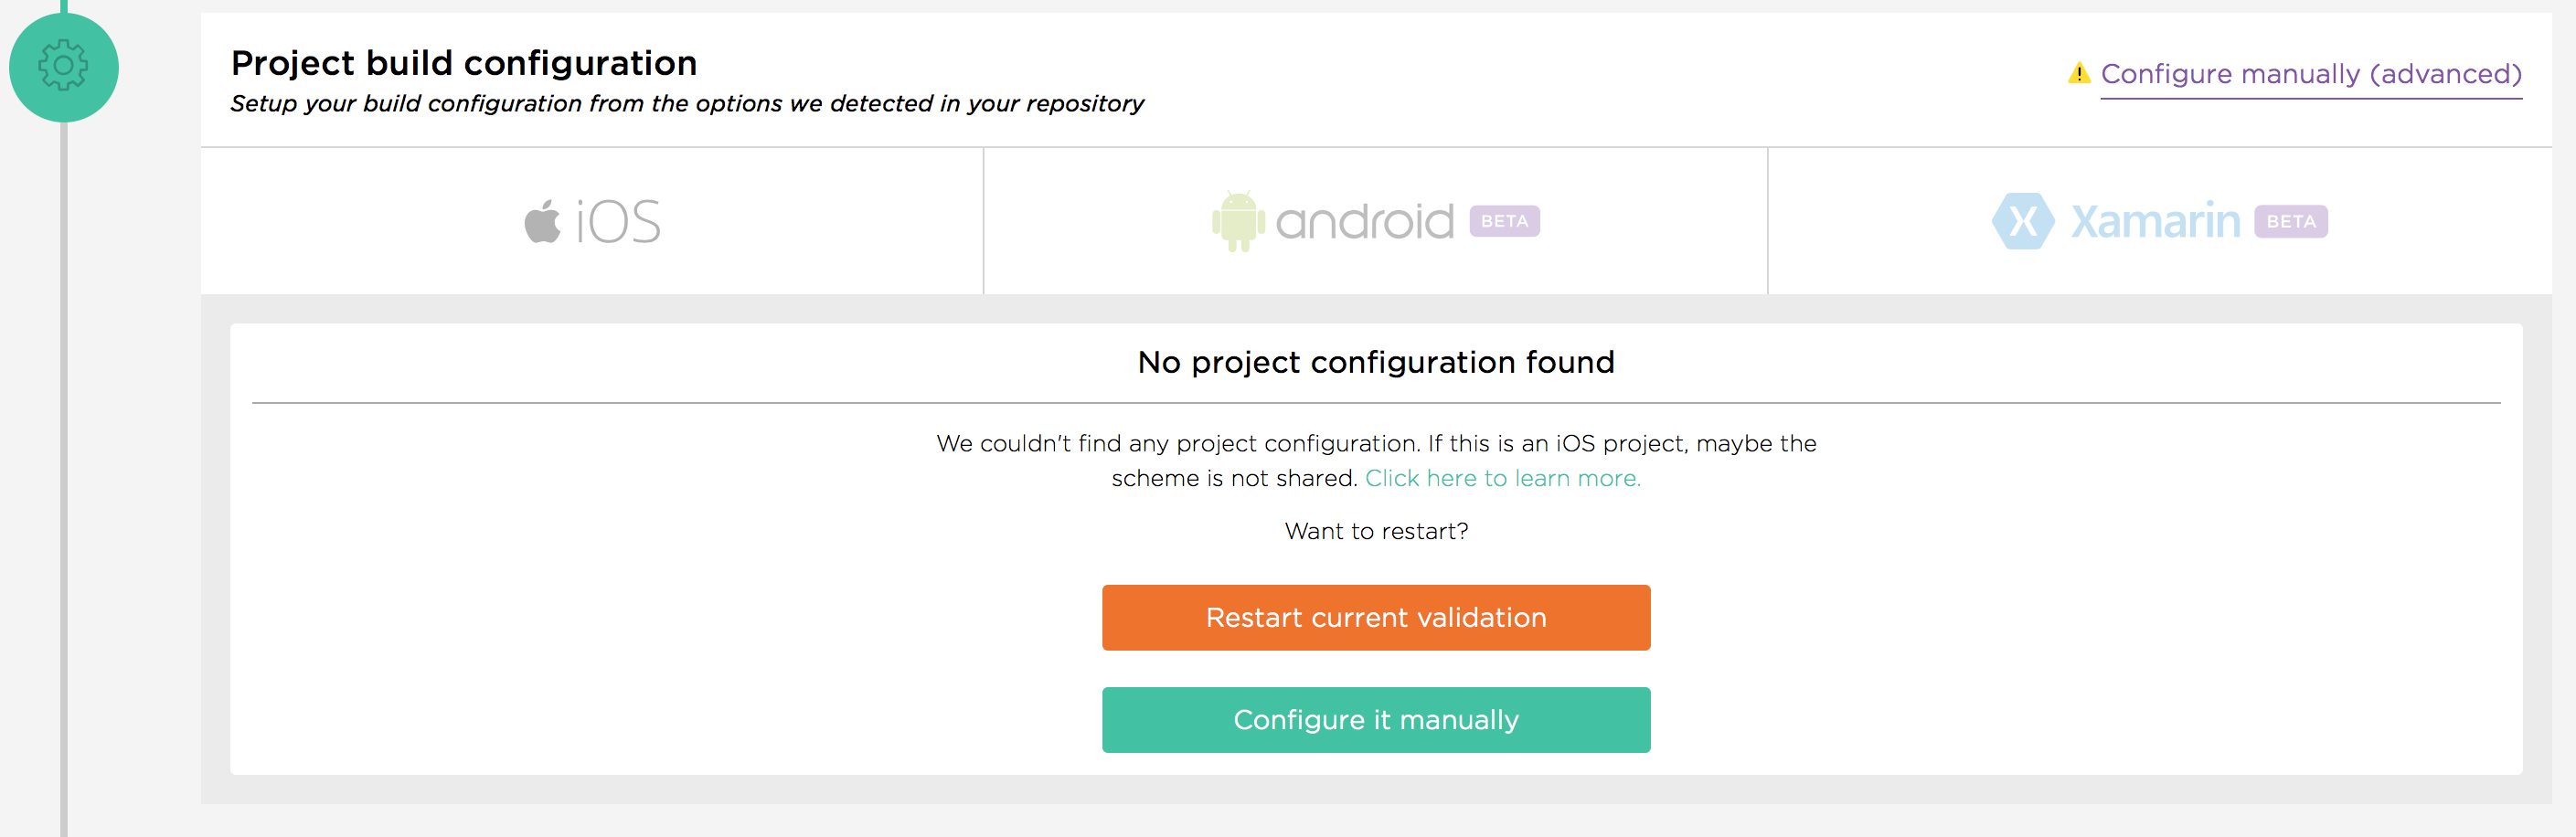
-
Enter following parameters (see screenshot). The only important information here is the branch name. We’ll modify or even delete Gradle tasks further in workflow configuration. Pressing
"I'm ready"should finish project configuration process.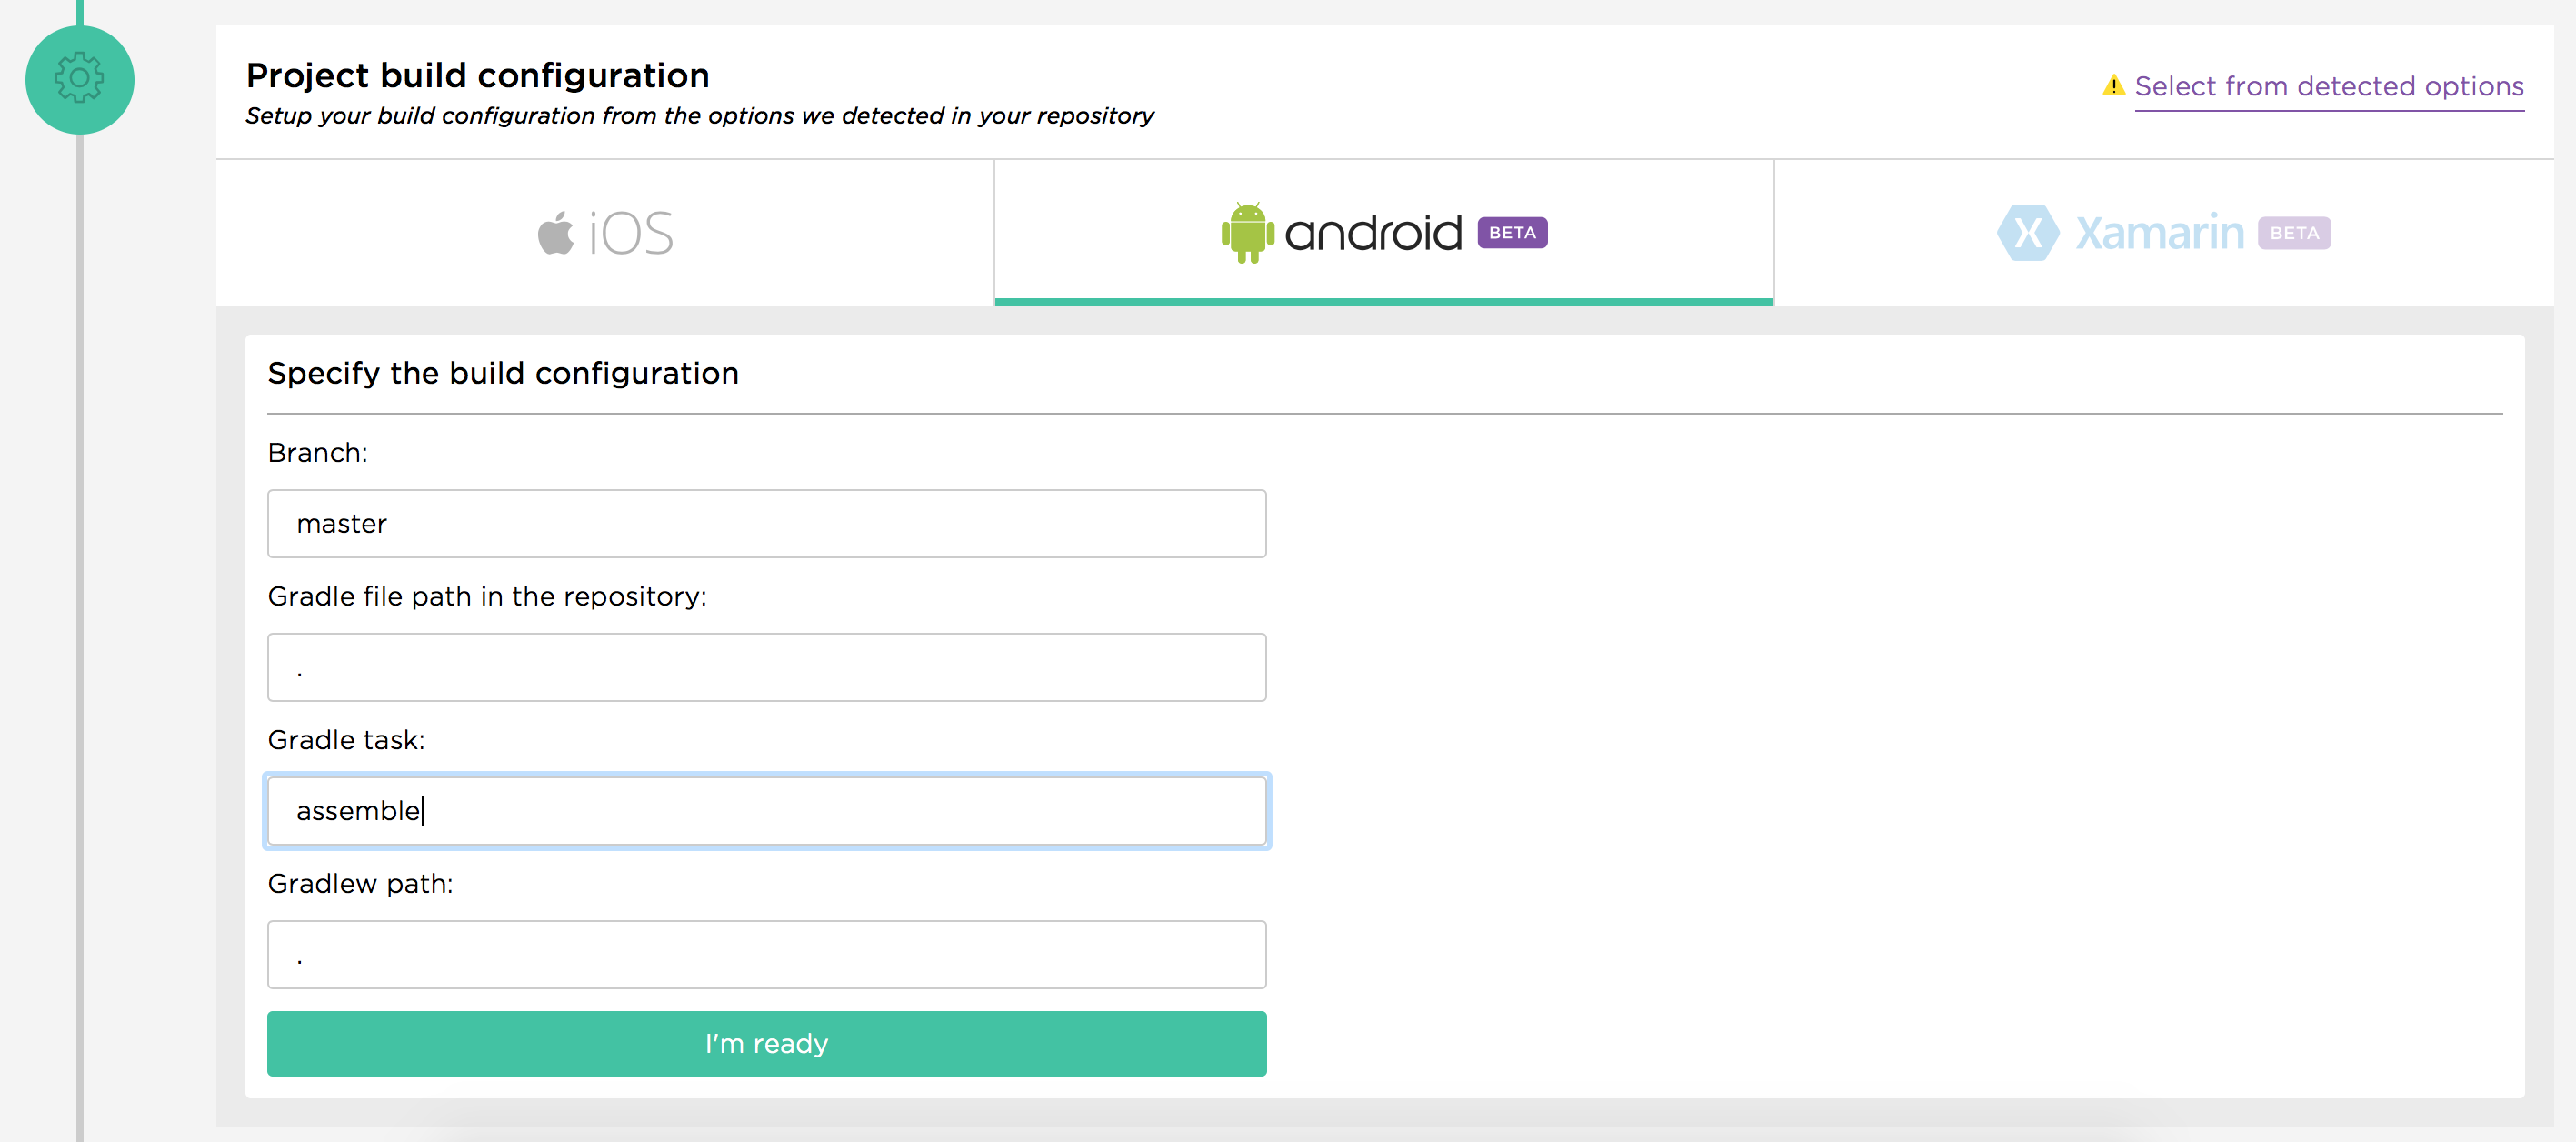
-
Navigate to project
"Settings"tab.
-
Scroll down to stacks section and enter
vgaidarji/docker-android-cordova:latestinto"Docker image to use". This is my custom docker image which has all required tools listed for Cordova Android projects.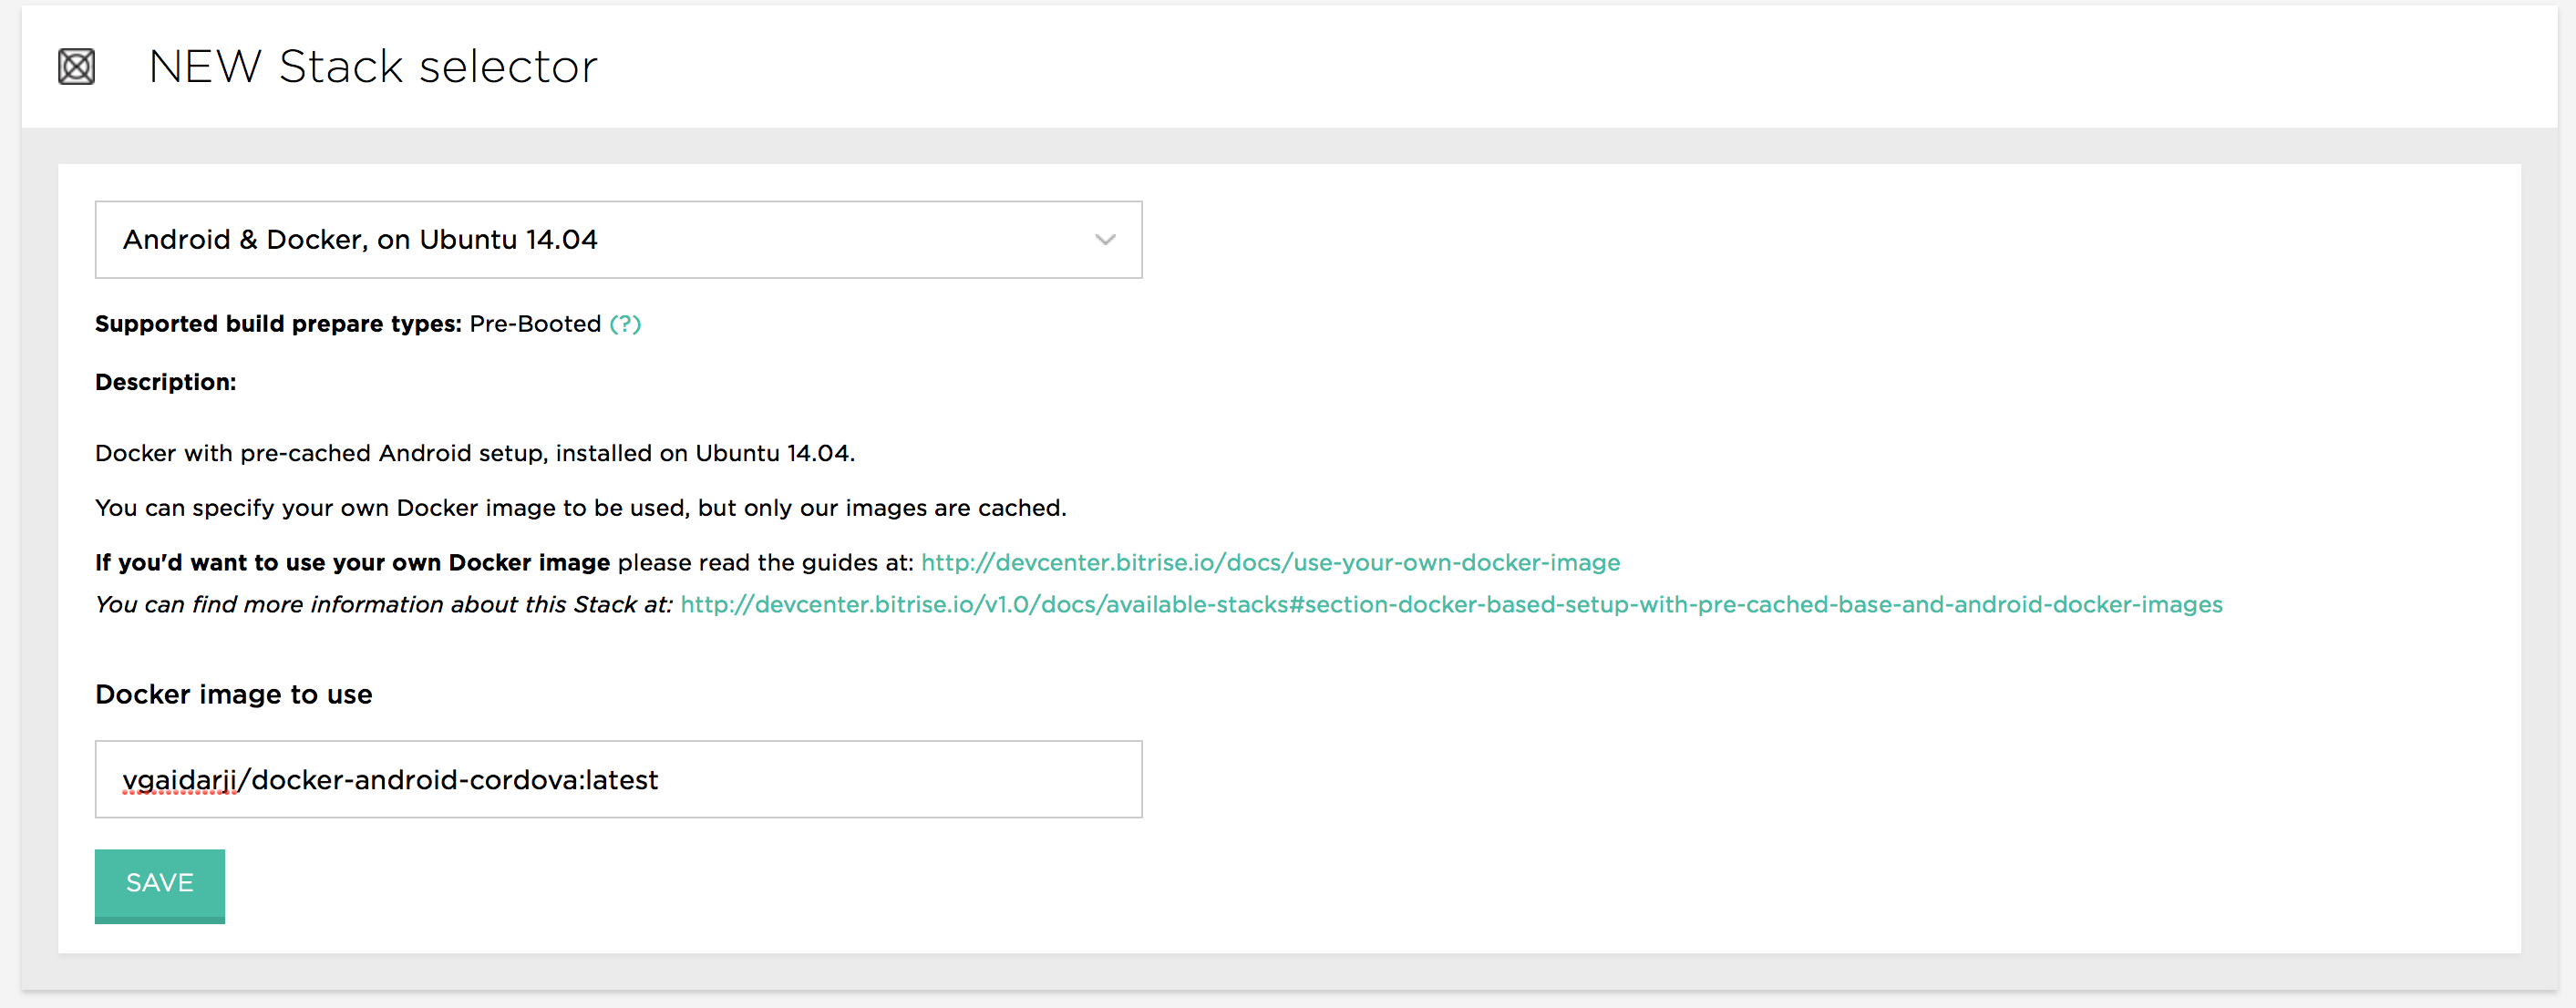
-
Go to
"Workflow"tab and select"Manage workflows"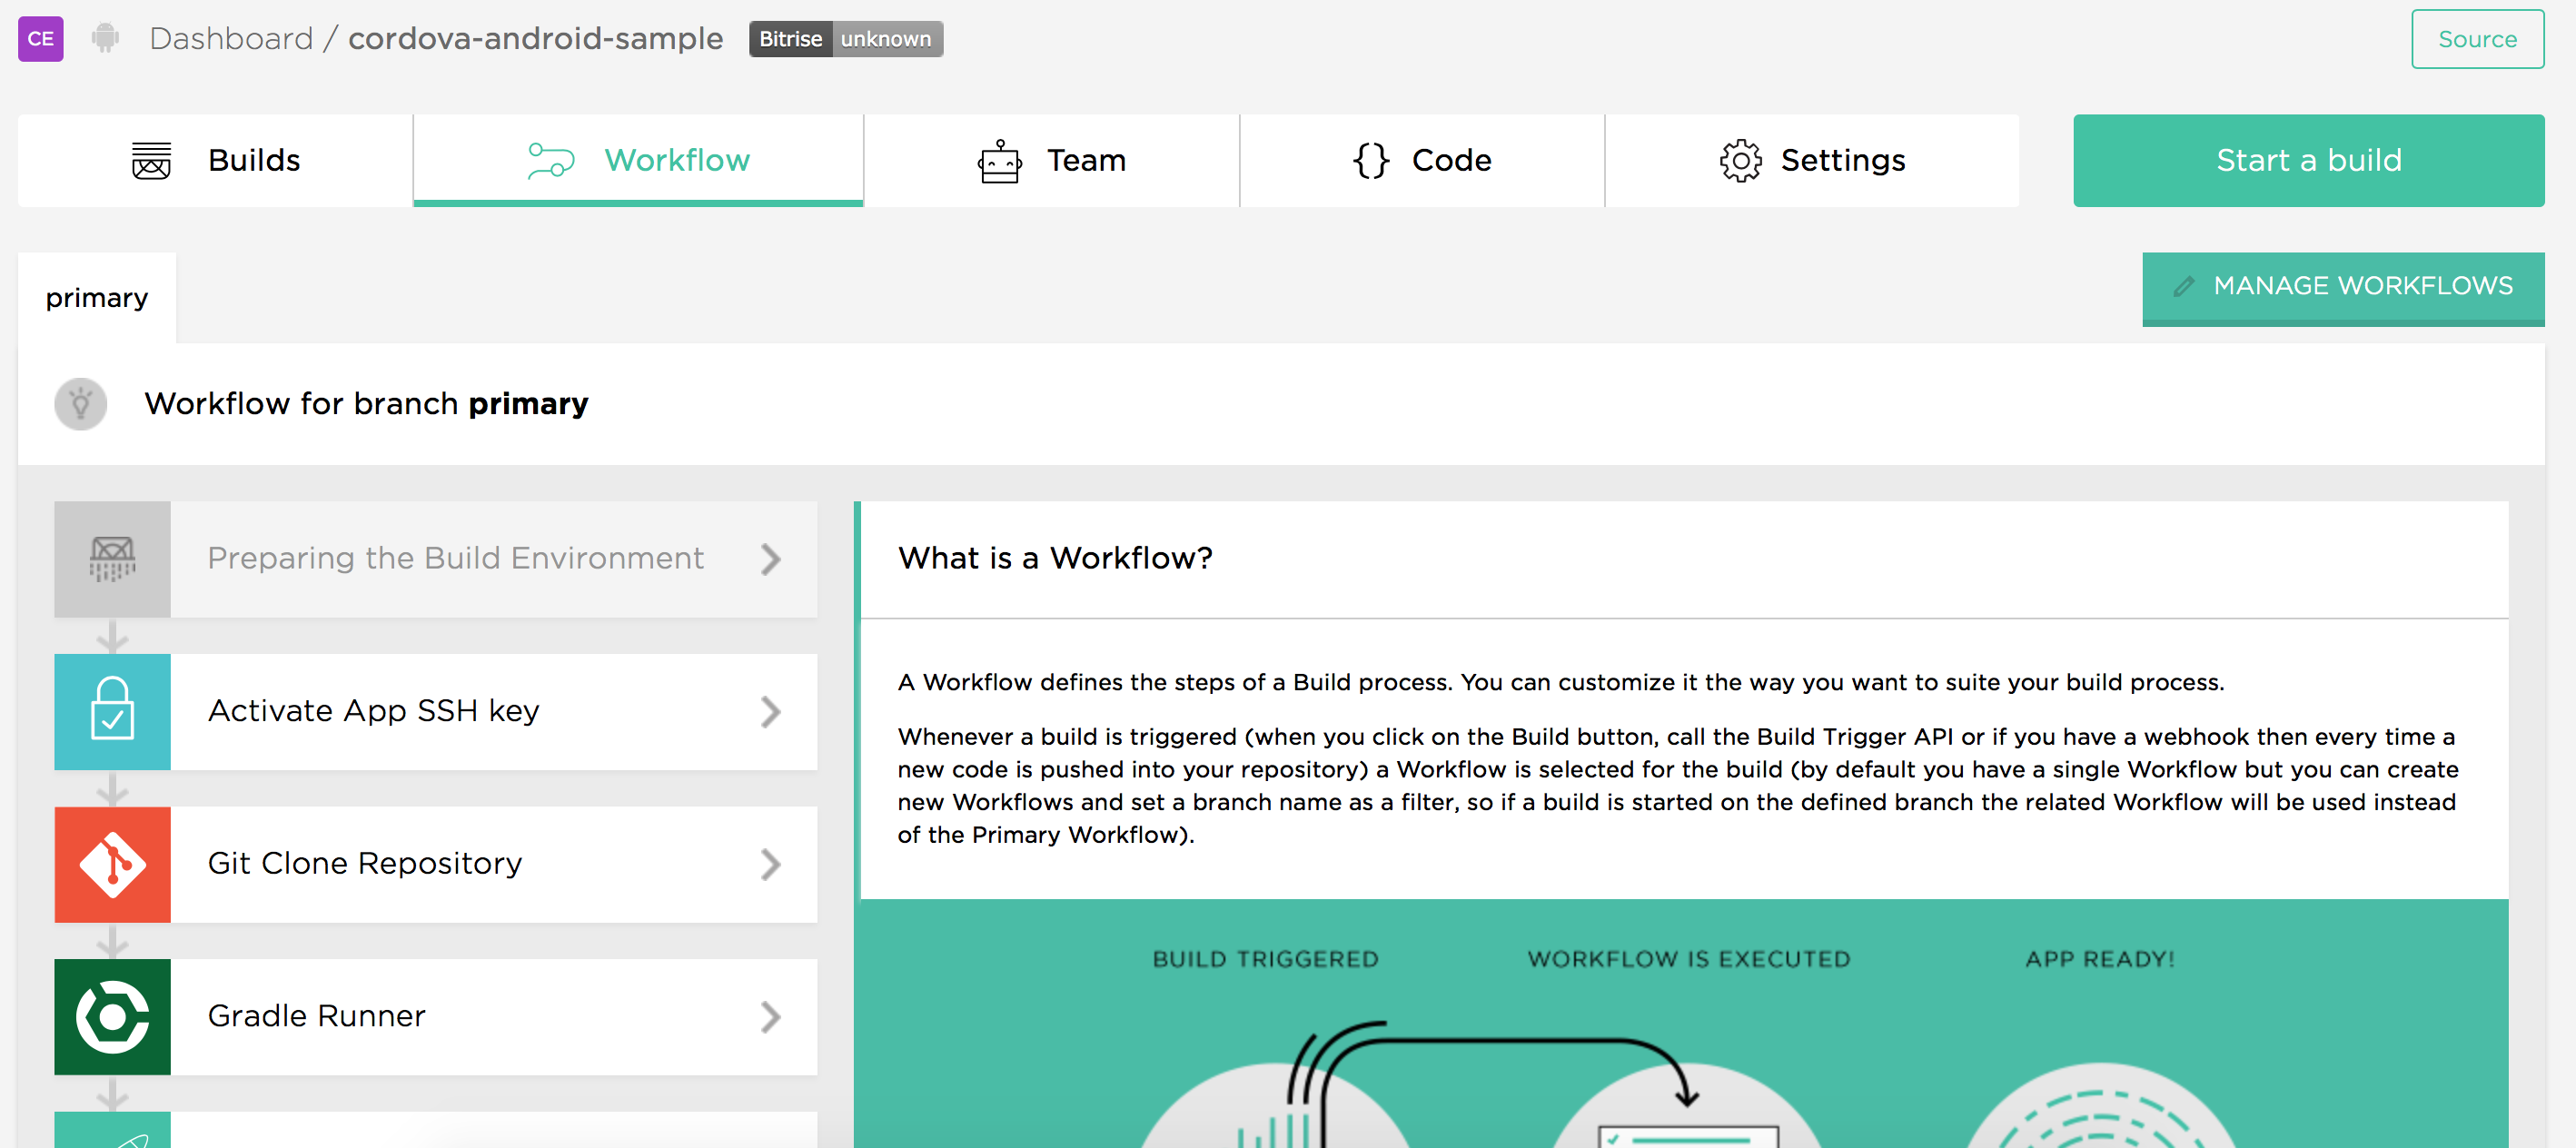
-
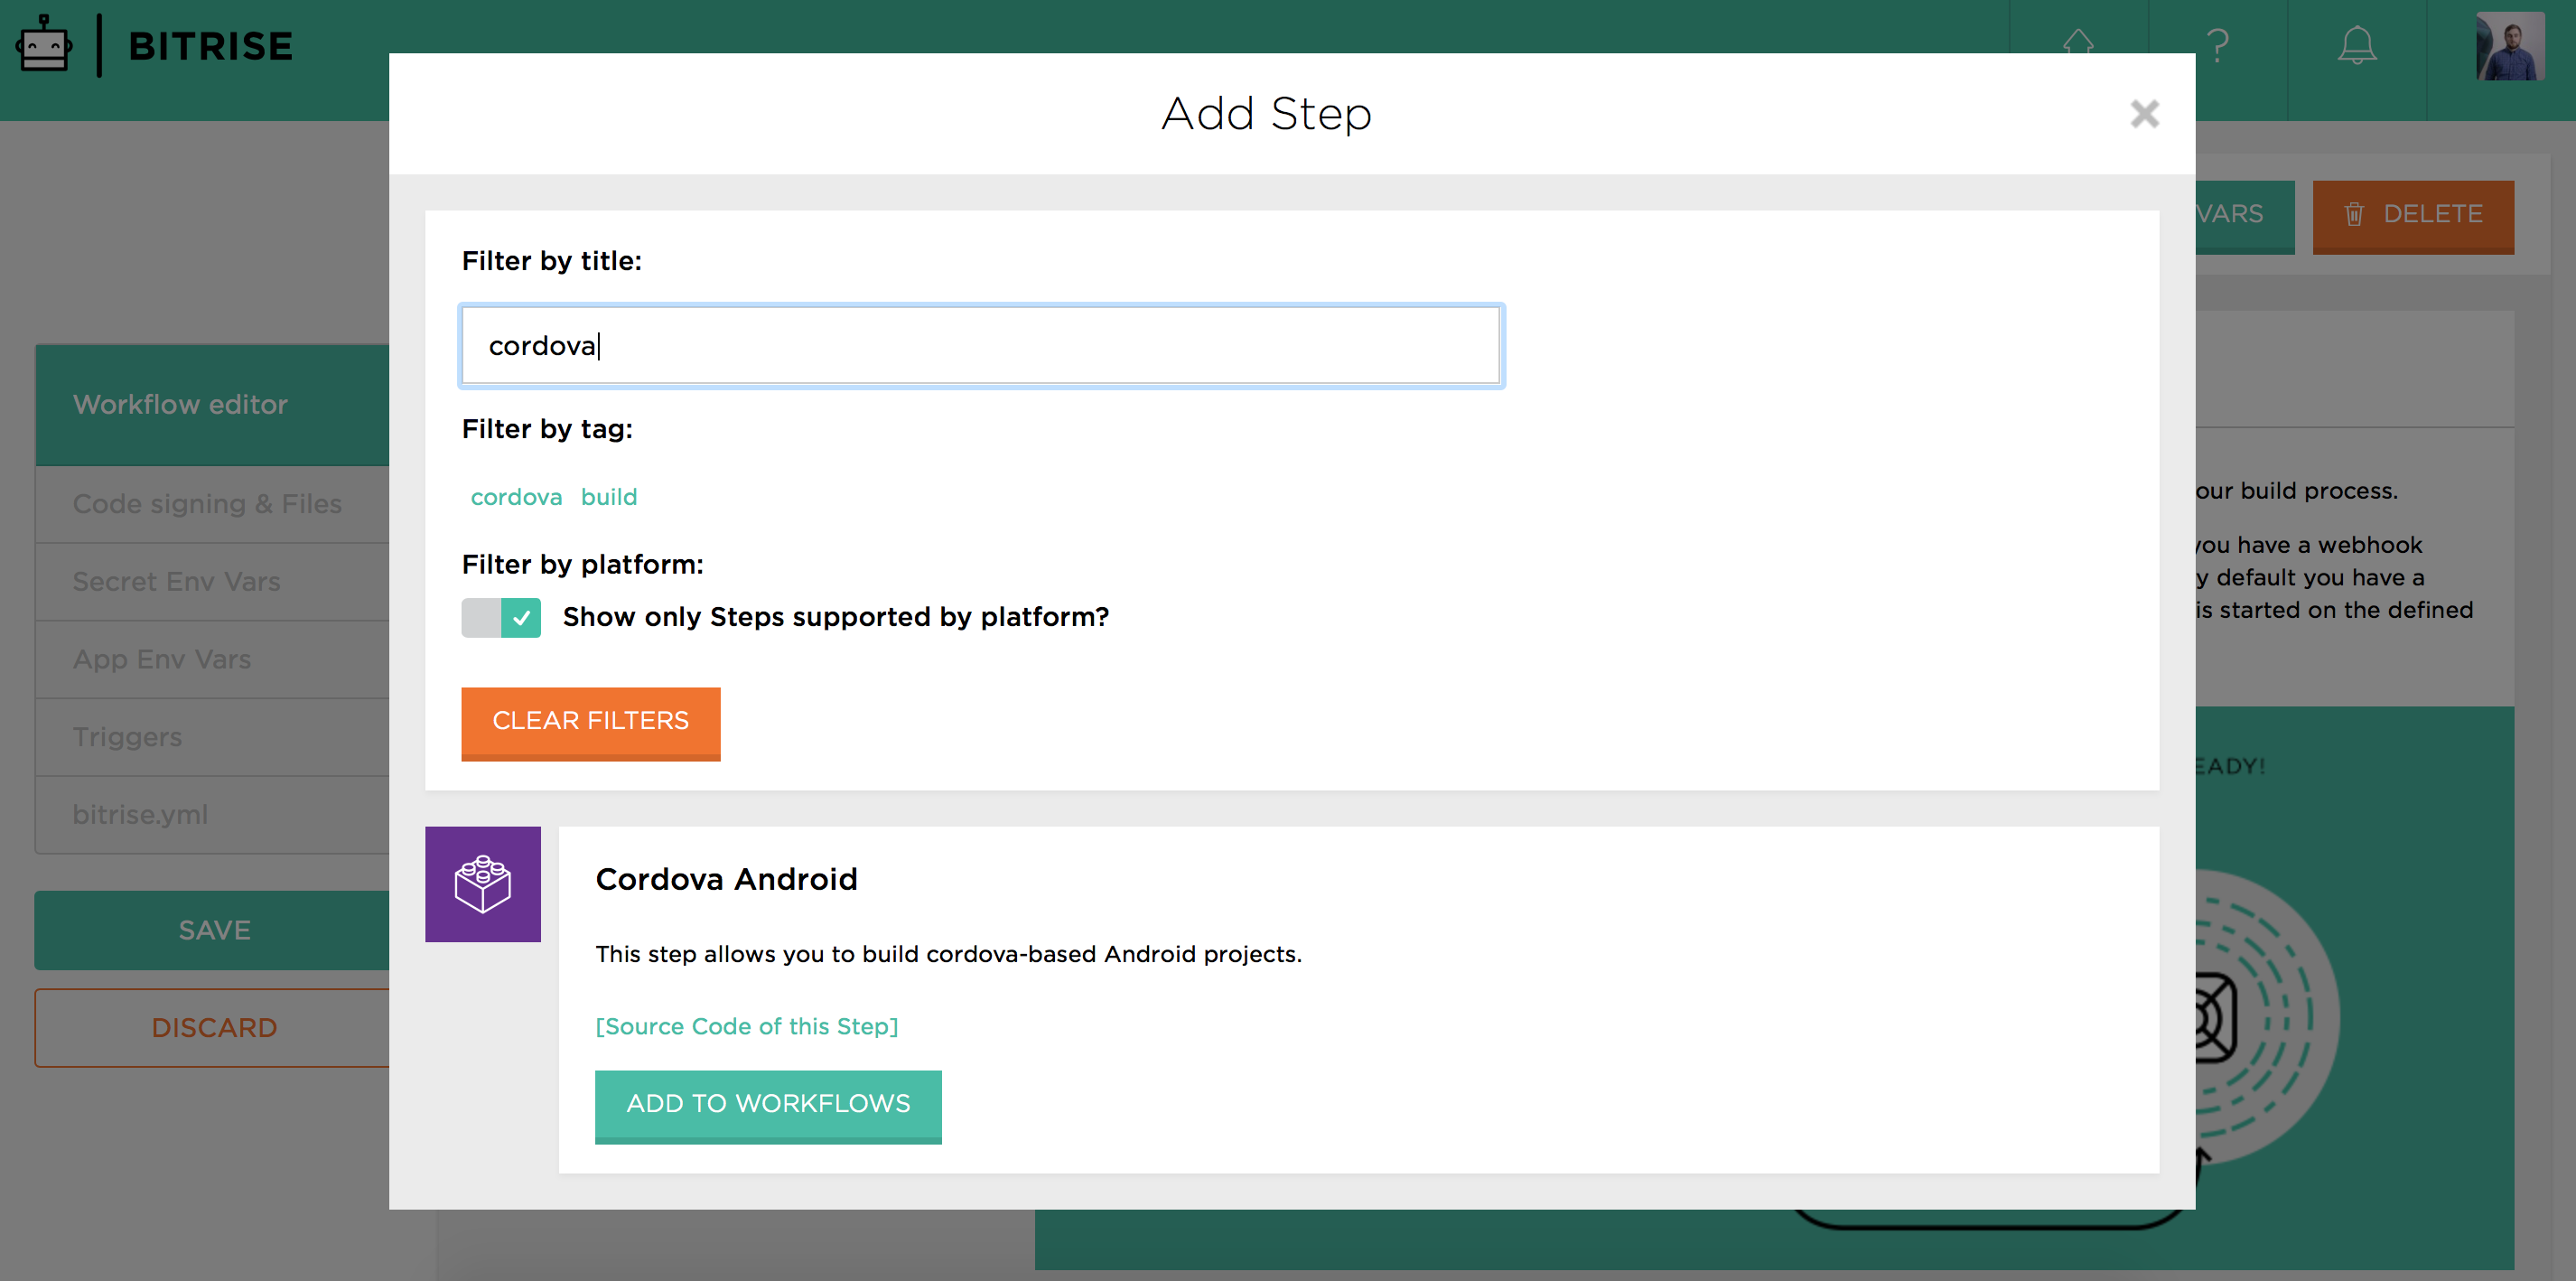
In “edit mode” remove default
"Gradle"step, and add"Cordova Android"between"Git clone repository"and"Deploy to bitrise.io"steps.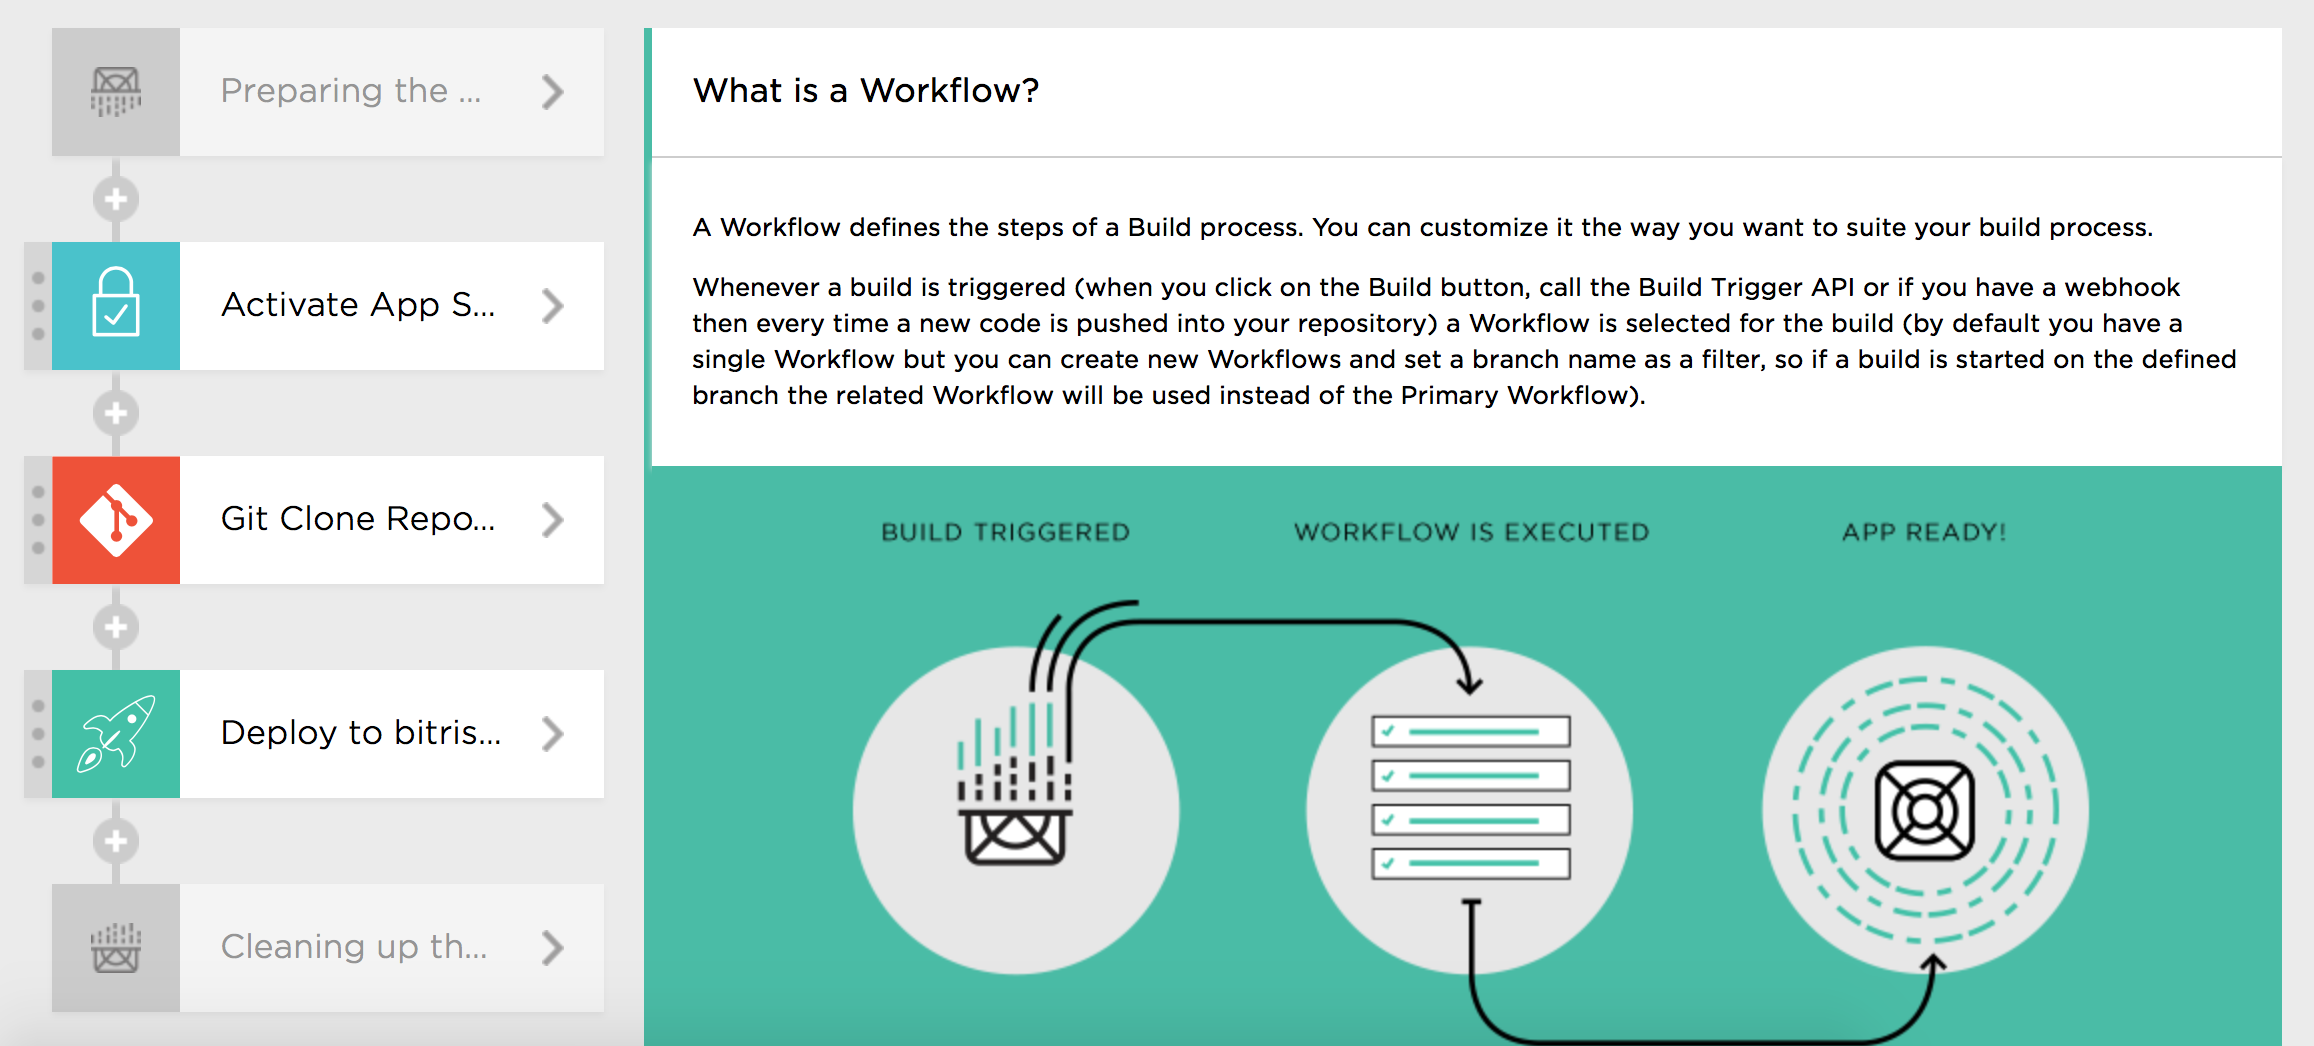
-
By default,
"Cordova Android"step will execute following command
cordova build android --verbose. Feel free to modify parameters. To be honest, I didn’t test all the commands, but they should work for sure.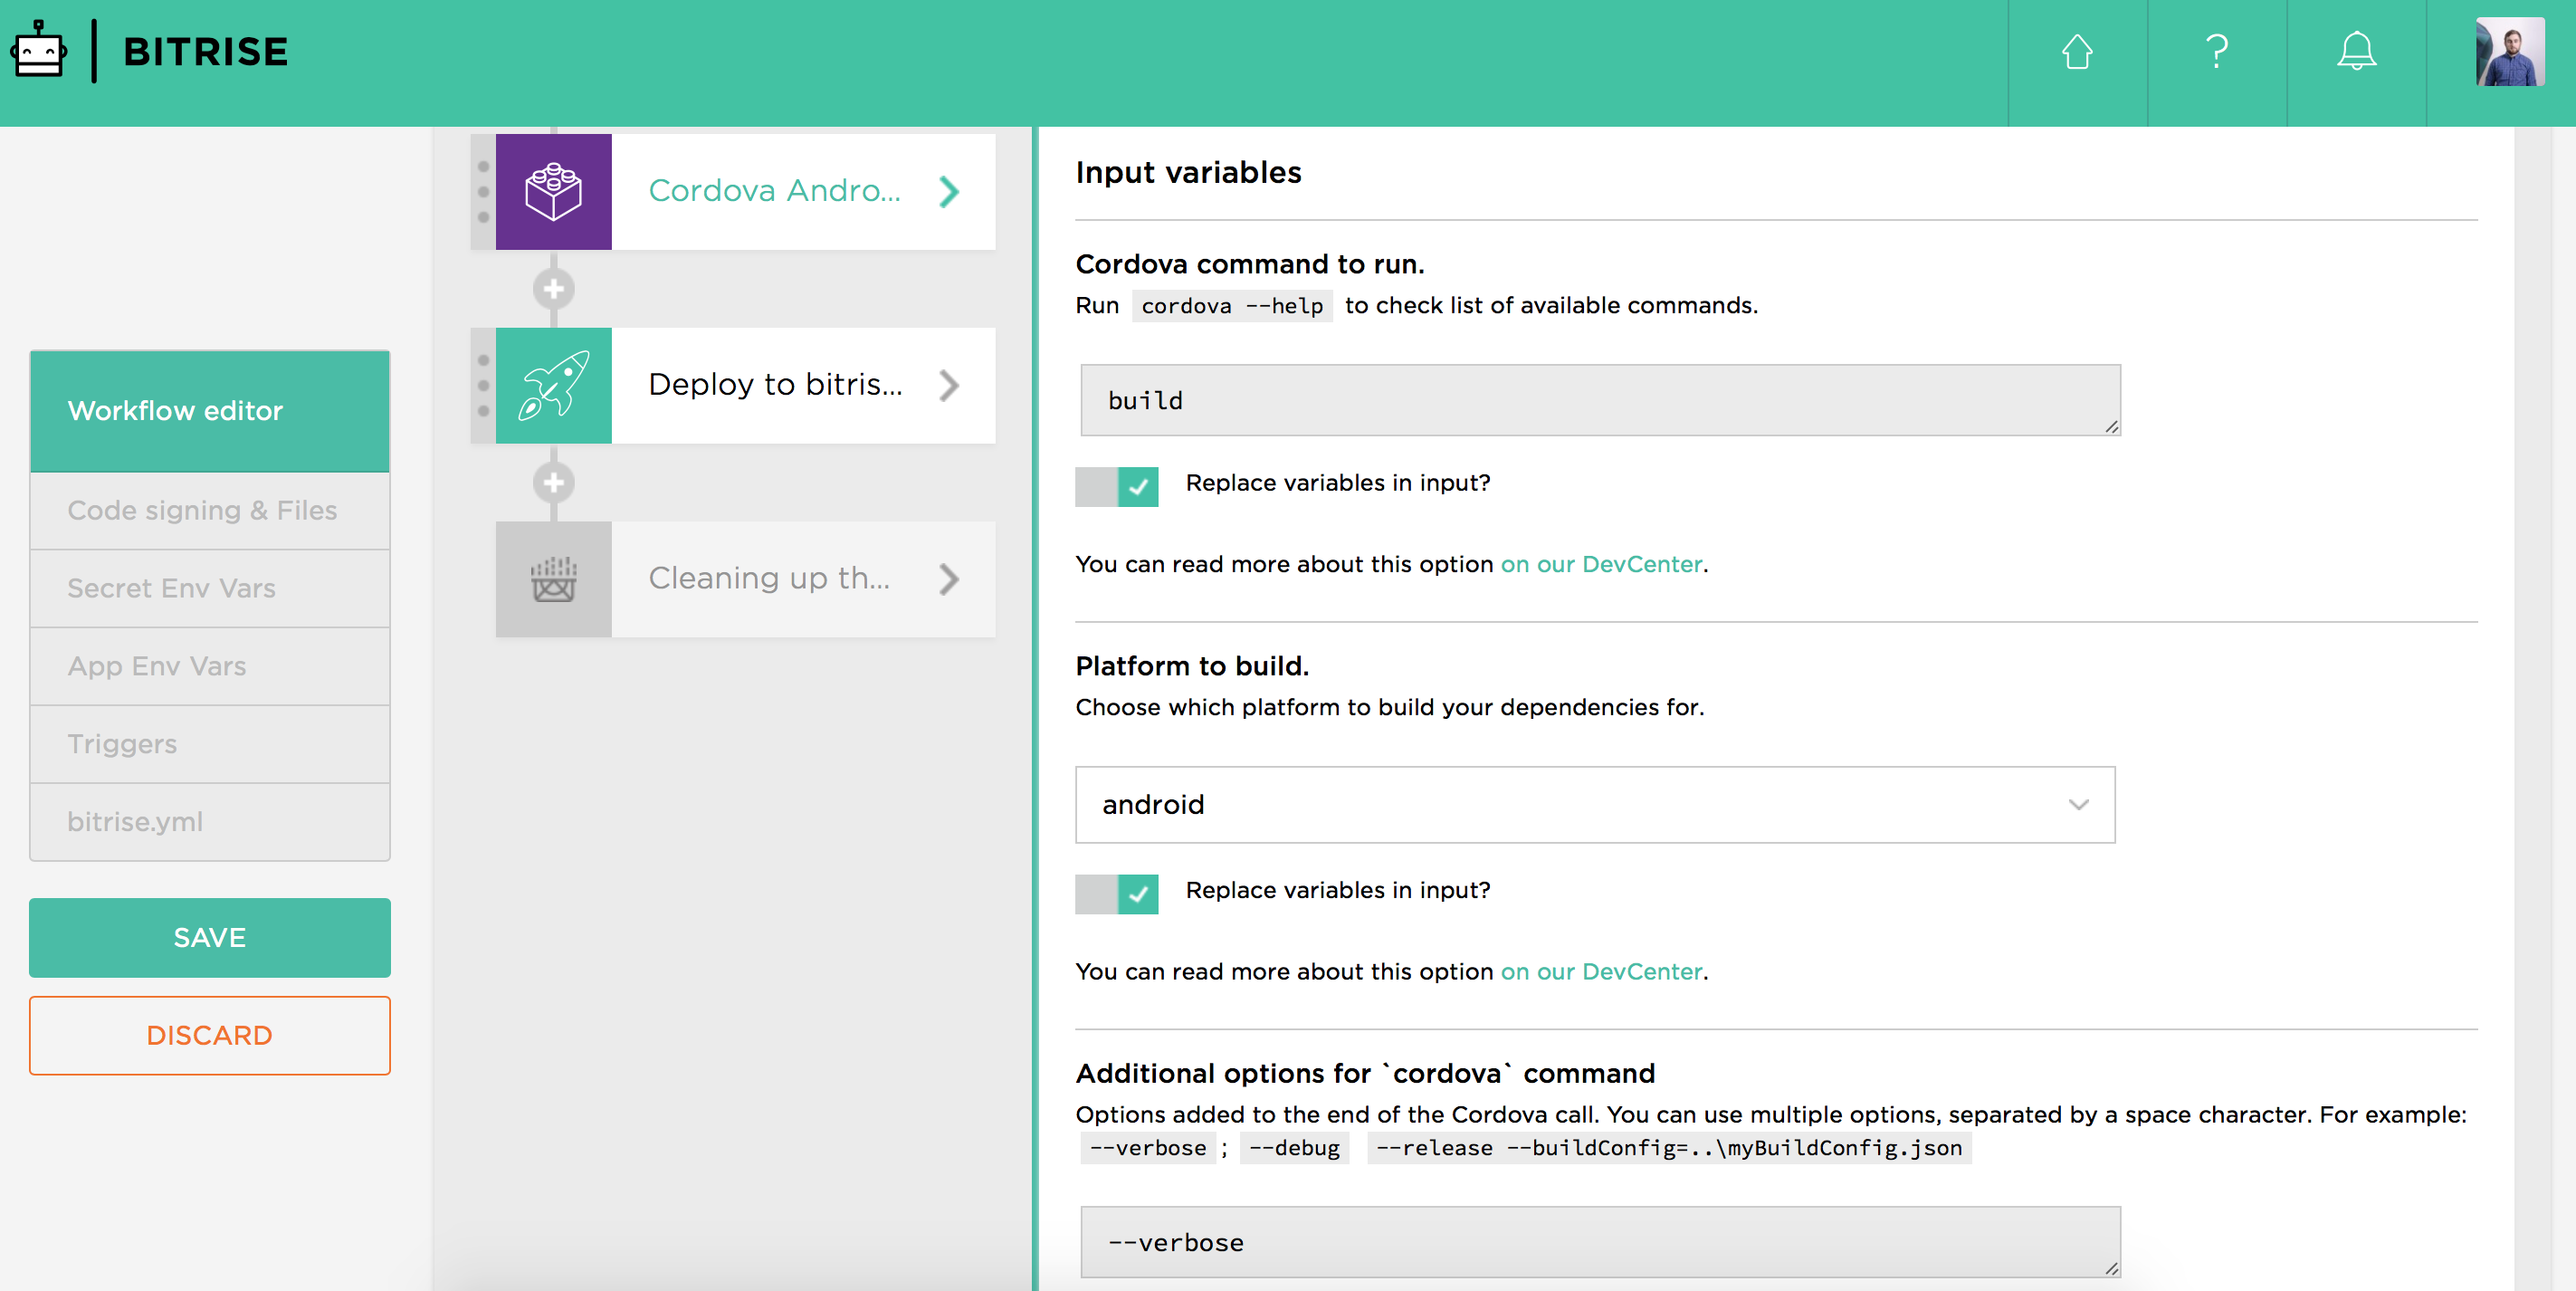
-
Press
"Save"button at left. Now we’re ready to build our project.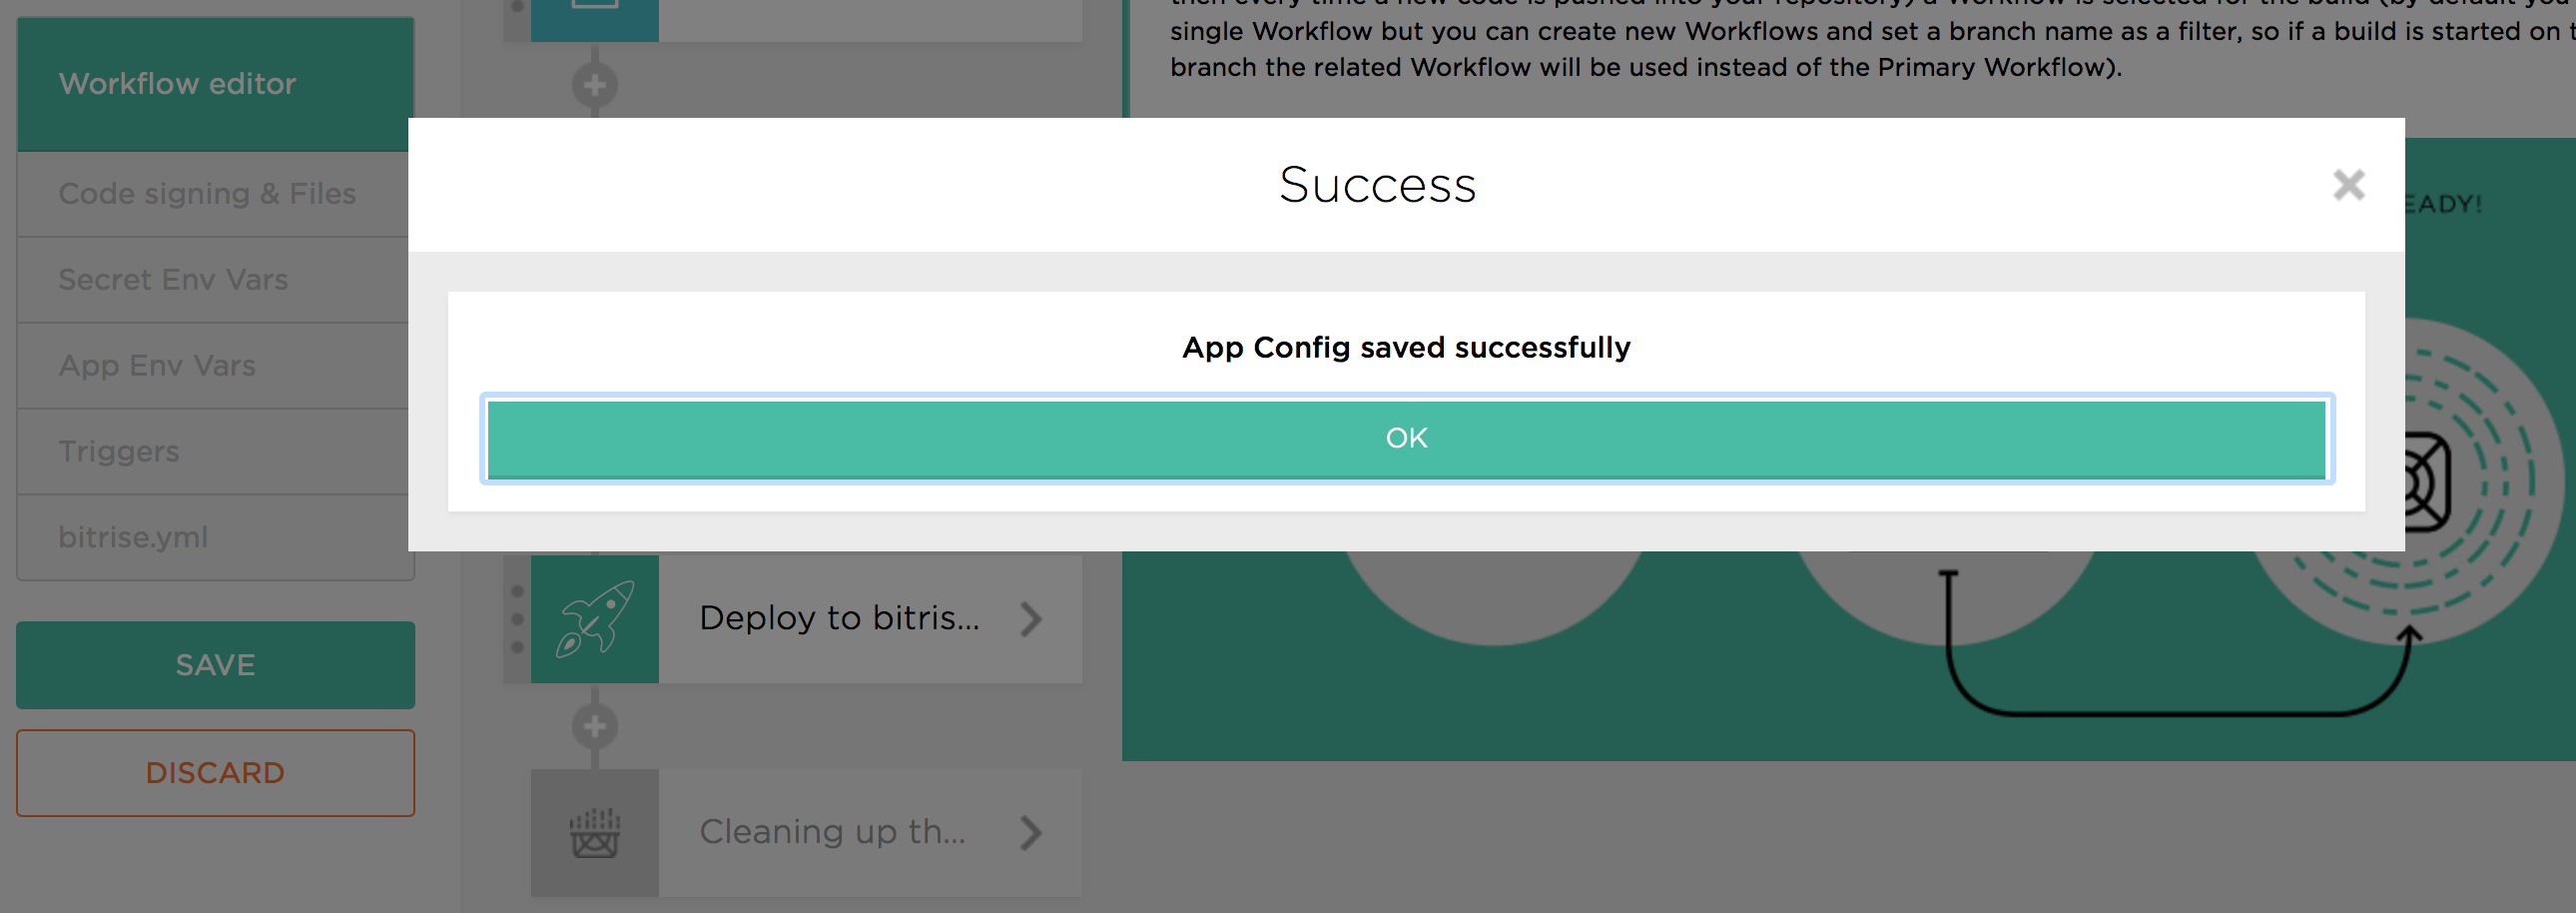
-
Navigate to
"Builds"tab and press"Start build". The build will use our default workflow, with"Cordova Android"step, and if everything is ok, you should see something like: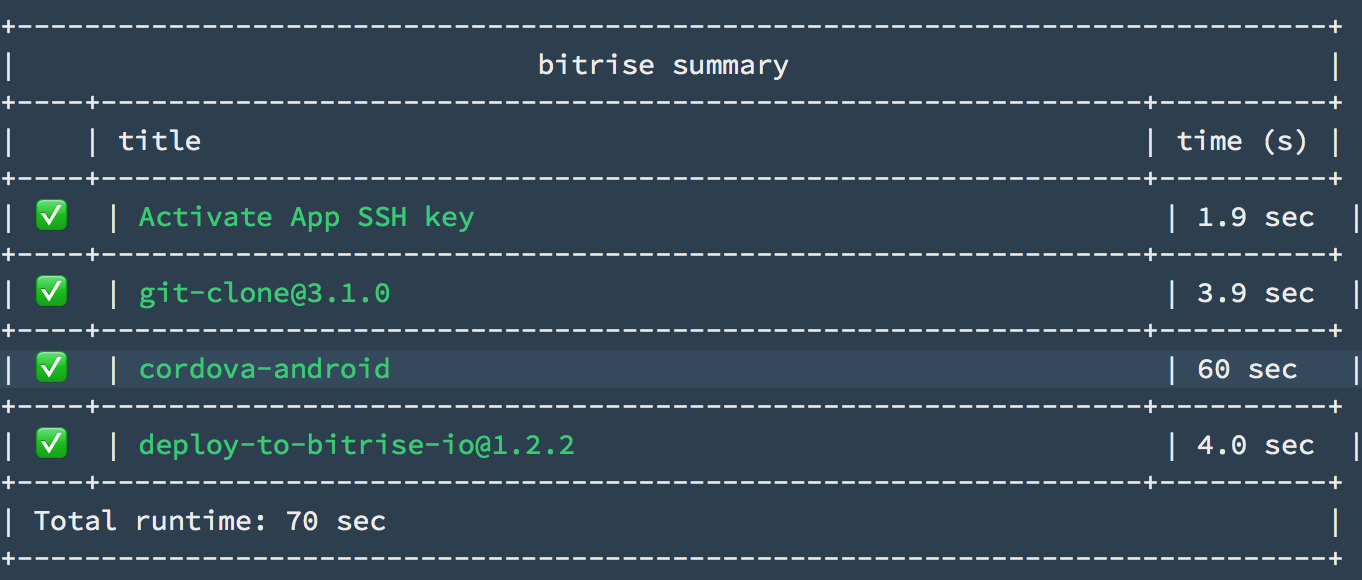
Configurations! We did it!
 +
+ 
Note: The one thing is that in this example we use custom docker image in order to build “Cordova Android” project at bitrise.io. In the near future, all Cordova related tools will be preinstalled in bitrise-base and/or bitrise-android docker images. It means that we’ll not need anymore additional docker image and “Cordova Android” projects should be supported by default.